How to Use a Solder Station
Written By: John R. Sewell
A little history of Soldering Irons first:
Early soldering irons were very basic in nature, in that they were just a resistance heater wrapped around some form of a “tip”. This tip was usually made of copper or an alloy of copper capibible of a high thermal conductivity. These were often used to join sheet metal, but were poor choice when electronics and semiconductors came along. Here are 2 reasons the early soldering irons were not a good use for electronics:1. There was no control of heat and any time you placed the tip on a joint, the tip could cool down and even drop below the melting point of solder, which would then burn insulation and overheat semiconductors.
2. Since copper will dissolve in molten solder, tips eroded quickly.
Well then along came the “Clad tip” which helped solve the eroding problem by cladding the copper with a layer of iron and then was coated “Tinned” with solder. The helped solve problem of eroded tips, more on this later.
Along with semiconductors came the more modern Soldering Irons and thenSoldering Stations. Soldering Stations are designed for use with “Electronic Solder” which contains Rosin or electronic grade Flux only. All lmodern solders contain some form of flux. The reason solder contains flux is to allow the solder to flow correctly on the 2 surfaces being soldered. In simple terms, the flux cleans the two surfaces so the solder will adhere. This means that you should not use plumbers flux or acid core solder. A rare, but still in use today, is a soldering iron that uses the “Curie Point” to control heat. The way this works is based on the fact that a permanent magnet looses it’s magnetism at a certain temperature. By using a tip with a magnet in it and a form of a “magnet on switch”, the iron will heat up to the Curie temperature and then cut off until the temperature drops. This is still brute control but very workable and provided a loose fixed temperature. By using different magnet alloys, tips were available that covered different temperature ranges.
As time went on, irons used the same principle as lamp dimmer; a Triac/SCR controlled the amount of voltage to the heater. Still no major control temperature could achieved but you could adjust it for heavier solder jobs. Later a thermistor was added to the tip area and then the temperature could be controlled with better accuracy.
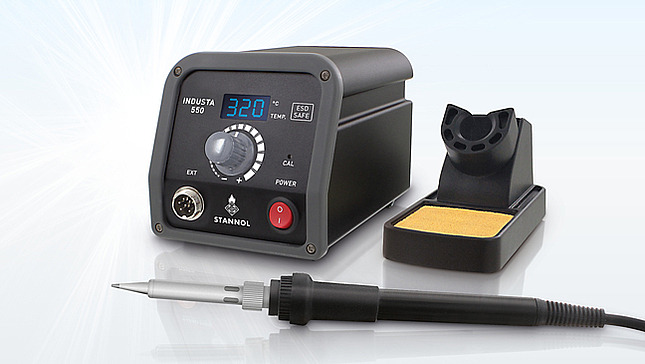
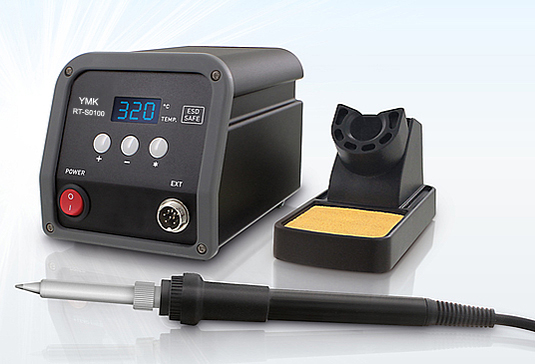
Some modern “Temperature Controlled” stations, (with either digital or analog controls) use a simple microprocessor to control the heat to the tip and respond to thermal loading quicker and thus control temperature much more accurately. These feature a fast heat up time and better response to high heat loads. The temperature controlled soldering stations come in 2 variations; Digital and Analog. The Digital Solder station will provide a LED/LCD display that will read the set temperature which is controlled by a dial. This reads back the most accurate temperature. The other type is an Standard Solder Station, which will have a dial with the temperature printed on it and you use that number to know what the solder station temperature actually is.
Now some tips and techniques on how to use a Soldering Station. Remember as you read this, nothing can replace practice and experience when soldering. So apply these techniques and practice them. With any type of iron, care is foremost to extend the life of the unit. The way youporeserv the tip of the iron is to keep it properly tinned. If you look at your Solder Station, you will see some form of sponge. It will probably be all dried out from your last soldering job, but you will need to moisten it. Do not overly saturate it, as it should not be to wet. A Wet sponge will cool the tip too quickly, stressing heater and tip. We use this sponge to brush the tip off to keep the tip clean. Never file the tip or scrape it, as this will damage the cladding. Once you damage the clad surface, then solder can then erode the copper base destroying the tip. Do not use the tip to pry components as this can damage the cladding as well. The first step is to tin the tip. Apply a little solder to the tip and then after it has covered the surface, gently brush it over the sponge quickly and your tip is ready to solder. When removing components, careful use of a solderwick or a solder sucker will work wonders. Use of a SMD Rework Solder Station (we will cover this in another Informational Articles) is even better!
If you are doing light soldering work then use set the temperature to a point that the solder melts quickly when brought to the tip. All surfaces should be clean with no corrosion. Place the iron on the joint to be soldered with a slight amount of solder on tip. Apply solder to the joint NOT JUST THE TIP. Use only enough solder to cover the joint. If the temperature is correct and using the right flux solder, the solder will flow correctly across the components. PC board component joints should have a slight concave appearance around the joint with no visible voids. A joint should never take more than a couple seconds or the circuit board, wire or component can be damaged. After each joint, or several if soldering an IC or multiple leg component, you should wipe the tip quickly on the sponge.
Best practice is to turn on the Solder Station several minutes before use to allow it to stabilize. When ready to solder, determine if area to be soldered might require more heat that normal, or less depending on the sensitivity of the component being soldered and adjust accordingly.
When you have soldered a component but are not ready to continue on to others, or are interrupted, you should clean tip, apply a small amount of solder and turn the temp control down to a low temperature (not off). This prevents oxidation of tip and solder, which will in turn prolong the life of Solder Station. A solder station of any type should not be left unattended for any reason for more than a couple minutes because of obvious fire hazards. When finished, immediately clean and then tin tip for storage. By doing this, you will have your Solder Station prepped and ready for use the next time you are working on a soldering project.